Extending Keycloak Themes with Keycloakify
Last modified: 5/29/2023
Prefer video format? See the youtube video instead
What is Keycloak?
Keycloak is an open-source identity and access management solution that enables authentication and authorization for web and mobile applications. It provides features such as single sign-on, social login, and user federation across different identity providers. With Keycloak, developers can focus on building their applications while delegating authentication and authorization to the Keycloak server.
I won’t be going too in depth into keycloak itself, as I want to stay focused on the theme extension aspect. In this article, my goal is to explain the value that Keycloakify adds as well as giving you some instructions to get started.
What is Keycloakify solving?
To answer this question requires a bit of context as to how keycloak themes work internally. You can find more information on keycloak theming at their docs page. There are two important pieces in my opinion though:
- Themes are defined in a file format called freemarker template (
.ftl). An example of one of the built-in theme pages looks like this (info.ftl):
<#import "template.ftl" as layout>
<@layout.registrationLayout displayMessage=false; section>
    <#if section = "header">
        <#if messageHeader??>
        ${messageHeader}
        <#else>
        ${message.summary}
        </#if>
    <#elseif section = "form">
    <div id="kc-info-message">
        <p class="instruction">${message.summary}<#if requiredActions??><#list requiredActions>: <b><#items as reqActionItem>${kcSanitize(msg("requiredAction.${reqActionItem}"))?no_esc}<#sep>, </#items></b></#list><#else></#if></p>
        <#if skipLink??>
        <#else>
            <#if pageRedirectUri?has_content>
                <p><a href="${pageRedirectUri}">${kcSanitize(msg("backToApplication"))?no_esc}</a></p>
            <#elseif actionUri?has_content>
                <p><a href="${actionUri}">${kcSanitize(msg("proceedWithAction"))?no_esc}</a></p>
            <#elseif (client.baseUrl)?has_content>
                <p><a href="${client.baseUrl}">${kcSanitize(msg("backToApplication"))?no_esc}</a></p>
            </#if>
        </#if>
    </div>
    </#if>
</@layout.registrationLayout>- Keycloak supports hosting asset files (ex images, javascript, css), but its approach involves hosting the assets at a hashed url that is unknown until the keycloak container has been built. For example a url for a static asset might look like the following (Note the hashed value in the second part of the url):
GET /resources/3czkt/common/keycloak/web_modules/@patternfly/react-core/dist/styles/base.cssThese two factors make it difficult to build a keycloak theme with a modern web framework like React, because most build systems require you to know the hosted url before building the app and output static assets along with html files, not freemarker templates. This is where Keycloakify comes in. It provides a built-in solution for react apps that answers the questions:
- How do I convert my app’s build to the proper set of freemarker templates that provide me access to templating variables in my webapp?
- How do I update asset URIs at runtime to reference the correct url where keycloak hosts them?
Getting Started
Keycloak
If you don’t already have a keycloak instance set up, the easiest way to get started is by creating a Dockerfile with the following contents:
FROM quay.io/keycloak/keycloak:latest as builder

WORKDIR /opt/keycloak
RUN /opt/keycloak/bin/kc.sh build

FROM quay.io/keycloak/keycloak:latest
COPY --from=builder /opt/keycloak/ /opt/keycloak/

ENV KC_HOSTNAME=localhost
ENTRYPOINT ["/opt/keycloak/bin/kc.sh", "start-dev"]
Next build and run the Docker image:
docker build -t keycloak-app .
docker run -e KEYCLOAK_ADMIN=admin -e KEYCLOAK_ADMIN_PASSWORD=admin -p 8080:8080 keycloak-app
From here, you should be able to access the keycloak admin UI at http://localhost:8080 and you should be able to login with username/password admin:admin:
Keycloakify
It is possible to setup Keycloakify from scratch but the easiest thing to do is clone the keycloakify-starter repo:
git clone https://github.com/keycloakify/keycloakify-starter.gitThis repo is set up with an app with all the boilerplate you need to get started to develop for a keycloak theme.
Next run the following to download dependencies and build the keycloak theme:
yarn install
yarn build-keycloak-theme
Once finished, you should see a jar file in the build_keycloak/target directory (Something like keycloakify-starter-keycloak-theme-4.4.4.jar).
This jar file contains a keycloak SPI for use in keycloak. Next we’ll need to configure keycloak to consume this jar.
Integrating Keycloak and Keycloakify Jar
To make your theme available within keycloak, you should copy it into keycloak’s /providers directory before building keycloak.
For a full Dockerfile example:
FROM node:18 as keycloakify_jar_builder

RUN apt-get update && \
    apt-get install -y openjdk-11-jdk && \
    apt-get install -y maven;

COPY ./keycloakify-starter/package.json ./keycloakify-starter/yarn.lock /opt/app/

WORKDIR /opt/app

RUN yarn install --frozen-lockfile

COPY ./keycloakify-starter/ /opt/app/

RUN yarn build-keycloak-theme

FROM quay.io/keycloak/keycloak:latest as builder

WORKDIR /opt/keycloak

COPY --from=keycloakify_jar_builder /opt/app/build_keycloak/target/keycloakify-starter-keycloak-theme-4.4.4.jar /opt/keycloak/providers/
RUN /opt/keycloak/bin/kc.sh build


FROM quay.io/keycloak/keycloak:latest
COPY --from=builder /opt/keycloak/ /opt/keycloak/
ENV KC_HOSTNAME=localhost
ENTRYPOINT ["/opt/keycloak/bin/kc.sh", "start-dev"]
Next build and run the Keycloak server:
docker build -t keycloak-app .
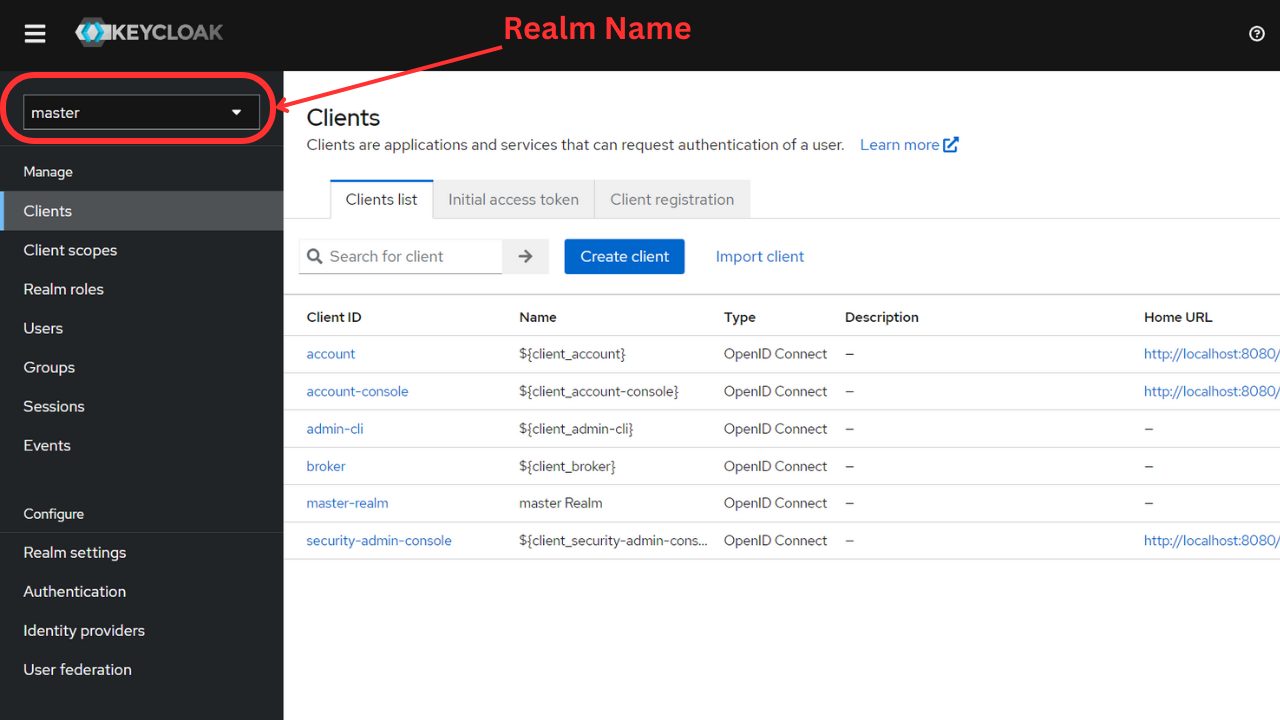
docker run -e KEYCLOAK_ADMIN=admin -e KEYCLOAK_ADMIN_PASSWORD=admin -p 8080:8080 keycloak-appOnce Keycloak is up and running, login to the admin console and navigate to the realm & client you want to apply the theme to.
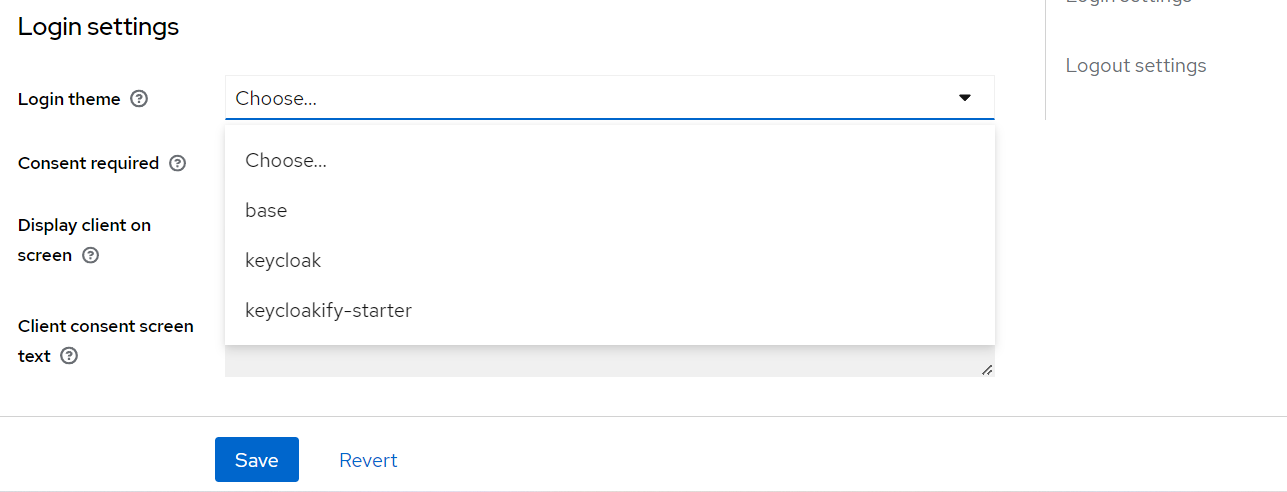
Next, navigate to the client’s login settings (towards the bottom of the page) and select the keycloakify-starter theme. Make sure to click Save.
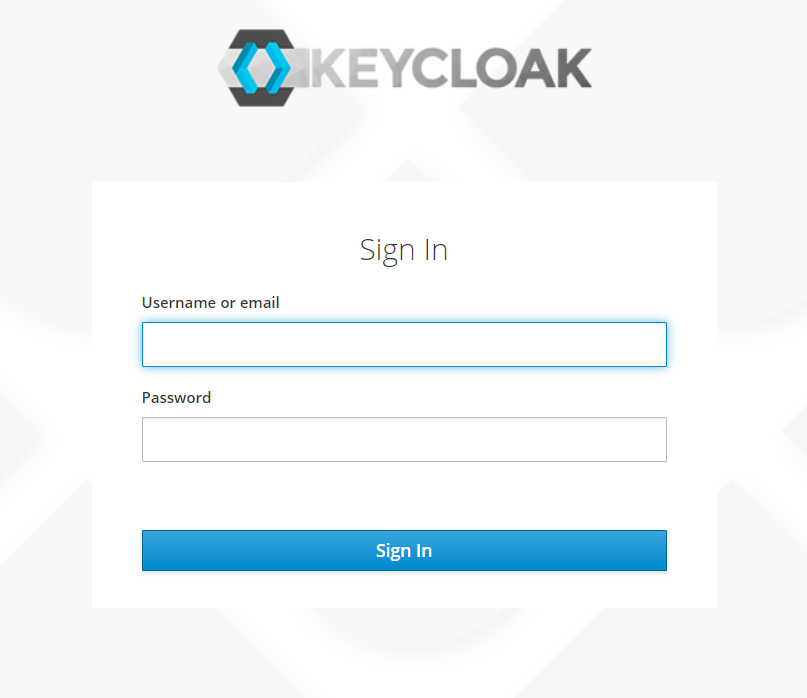
That’s it! Now if you navigate to your client’s login page, you should be served up the React keycloakify app!
Making Changes
Individual Pages
Each keycloak page has a corresponding .ftl file that is used when rendering the page. The keycloakify starter app sets you up with a
default set of mappings of .ftl files to React components. At the time of writing these definitions live in the KCApp.tsx file:
import "./KcApp.css";
import { lazy, Suspense } from "react";
import Fallback, { type PageProps } from "keycloakify/login";
import type { KcContext } from "./kcContext";
import { useI18n } from "./i18n";

const Template = lazy(() => import("./Template"));
const DefaultTemplate = lazy(() => import("keycloakify/login/Template"));

// You can uncomment this to see the values passed by the main app before redirecting.
//import { foo, bar } from "./valuesTransferredOverUrl";
//console.log(`Values passed by the main app in the URL parameter:`, { foo, bar });

const Login = lazy(() => import("./pages/Login"));
// If you can, favor register-user-profile.ftl over register.ftl, see: https://docs.keycloakify.dev/realtime-input-validation
const Register = lazy(() => import("./pages/Register"));
const RegisterUserProfile = lazy(() => import("./pages/RegisterUserProfile"));
const Terms = lazy(() => import("./pages/Terms"));
const MyExtraPage1 = lazy(() => import("./pages/MyExtraPage1"));
const MyExtraPage2 = lazy(() => import("./pages/MyExtraPage2"));
const Info = lazy(() => import("keycloakify/login/pages/Info"));

// This is like adding classes to theme.properties
// https://github.com/keycloak/keycloak/blob/11.0.3/themes/src/main/resources/theme/keycloak/login/theme.properties
const classes: PageProps<any, any>["classes"] = {
  // NOTE: The classes are defined in ./KcApp.css
  kcHtmlClass: "my-root-class",
  kcHeaderWrapperClass: "my-color my-font",
};

export default function KcApp(props: { kcContext: KcContext }) {
  const { kcContext } = props;

  const i18n = useI18n({ kcContext });

  if (i18n === null) {
    //NOTE: Locales not yet downloaded, we could as well display a loading progress but it's usually a matter of milliseconds.
    return null;
  }

  /*
   * Examples assuming i18n.currentLanguageTag === "en":
   * i18n.msg("access-denied") === <span>Access denied</span>
   * i18n.msg("foo") === <span>foo in English</span>
   */

  return (
    <Suspense>
      {(() => {
        switch (kcContext.pageId) {
          case "login.ftl":
            return (
              <Login
                {...{ kcContext, i18n, Template, classes }}
                doUseDefaultCss={true}
              />
            );
          case "register.ftl":
            return (
              <Register
                {...{ kcContext, i18n, Template, classes }}
                doUseDefaultCss={true}
              />
            );
          case "register-user-profile.ftl":
            return (
              <RegisterUserProfile
                {...{ kcContext, i18n, Template, classes }}
                doUseDefaultCss={true}
              />
            );
          case "terms.ftl":
            return (
              <Terms
                {...{ kcContext, i18n, Template, classes }}
                doUseDefaultCss={true}
              />
            );
          case "my-extra-page-1.ftl":
            return (
              <MyExtraPage1
                {...{ kcContext, i18n, Template, classes }}
                doUseDefaultCss={true}
              />
            );
          case "my-extra-page-2.ftl":
            return (
              <MyExtraPage2
                {...{ kcContext, i18n, Template, classes }}
                doUseDefaultCss={true}
              />
            );
          // We choose to use the default Template for the Info page and to download the theme resources.
          case "info.ftl":
            return (
              <Info
                {...{ kcContext, i18n, classes }}
                Template={DefaultTemplate}
                doUseDefaultCss={true}
              />
            );
          default:
            return (
              <Fallback
                {...{ kcContext, i18n, classes }}
                Template={DefaultTemplate}
                doUseDefaultCss={true}
              />
            );
        }
      })()}
    </Suspense>
  );
}
If you aren’t sure which pageId you should be using to override the page you want, take a look at the hosted storybook instance to get an idea: https://storybook.keycloakify.dev.
Other Updates
The keycloakify-starter repo sets you up with a create-react-app that can be easily injected at runtime. You should have access to all the tools you would in any other React app, which gives you a lot of flexibility. During development, it’s recommended to use the storybook instance included in keycloakify-starter by running yarn storybook. Some additional changes you can make:
- Have Keycloak host static assets by putting them in the
/public/directory of your app - Define i18n values that get displayed basd on the user’s configured language
- Access Build Time Variables by prefixing your environment variables with
REACT_APP_and access withprocess.env.REACT_APP_MY_VAR - Access Runtime Keycloak Environment Variables by adding the following to your app’s
package.json:... "keycloakify: { "extraThemeProperties": ["yourCustomProperty=${env.YOUR_VAR:defaultvalue}"] }-
From here you should be able to access your theme property at
kcContext.properties.yourCustomProperty(Note: this relationship is not currently typesafe, so you will get a type error when you try to access your property — this can be ignored)
-
Conclusion
This was by no means an all-inclusive look at the features of keycloakify, but hopefully this shows you the value that keycloakify adds to your app. For a more holistic view of the features of keycloakify, see their documentation page: https://docs.keycloakify.dev/. Happy Coding!